

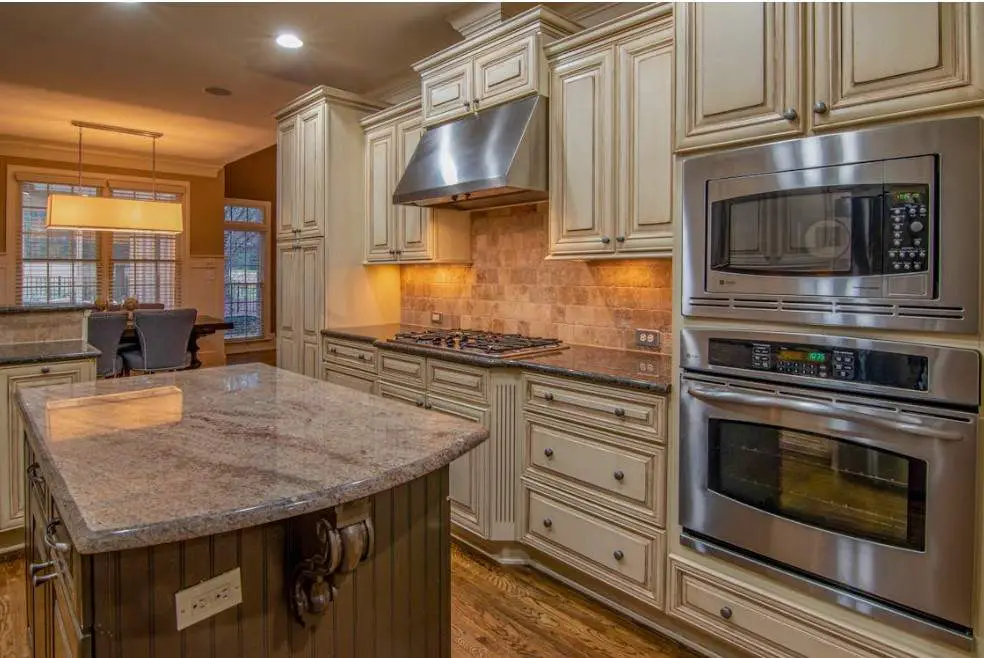
How to Clean Kitchen Cabinets for Painting? Easy Prep Tips
To clean kitchen cabinets for painting, start by removing all hardware and wiping surfaces with a degreaser. Follow up with sanding to create a smooth base for paint.
Preparing kitchen cabinets for a fresh coat of paint involves a thorough cleaning process to ensure the best results. This task is crucial for the paint to adhere properly and for achieving a professional-looking finish. Begin with emptying the cabinets and removing any knobs, handles, or hinges.
Use a high-quality degreaser to eliminate grease and dirt buildup, which is common in the kitchen environment. After the degreasing step, sanding the surfaces is essential to not only remove the glossy layer but also to provide a texture that will help the new paint to bond effectively. Ensuring that the cabinets are free of dust after sanding will pave the way for a smooth and long-lasting paint job. Whether you’re aiming for a modern update or a classic refresh, starting with a clean slate is key to transforming your kitchen cabinets.
Assessing The Cabinets
Before embarking on the journey of transforming your kitchen cabinets with a fresh coat of paint, a crucial step is assessing the cabinets. This stage sets the foundation for a successful painting job. It involves understanding what you’re working with and preparing the cabinets for the paint to adhere properly.
Determining Cabinet Material
Knowing your cabinet’s material is essential. Different materials require specific preparation techniques. Here’s a simple guide:
- Wood: Look for a cabinet degreaser for painting that is wood-friendly.
- Laminate: Use a gentle cleaner to avoid damage.
- Metal: A stronger degreaser might be needed.
Choose the best kitchen cabinet degreaser before painting based on your cabinet’s material. This ensures a clean surface for the new paint to bond.
Inspecting For Damage
Examine each cabinet carefully. Look for signs of wear and tear:
| Type of Damage | Action to Take |
|---|---|
| Scratches | Sand the area smoothly. |
| Dents | Fill with wood filler. |
| Loose hinges | Tighten or replace hardware. |
Addressing these issues before painting is vital. It ensures a smooth and flawless finish.
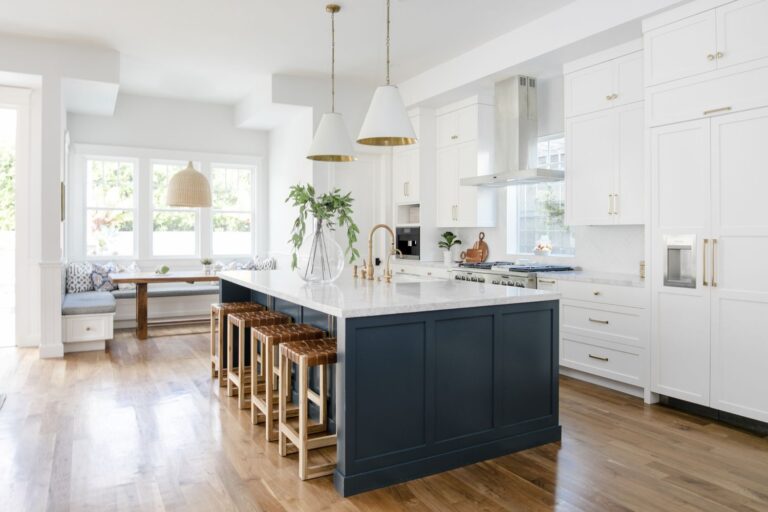
Credit: dengarden.com
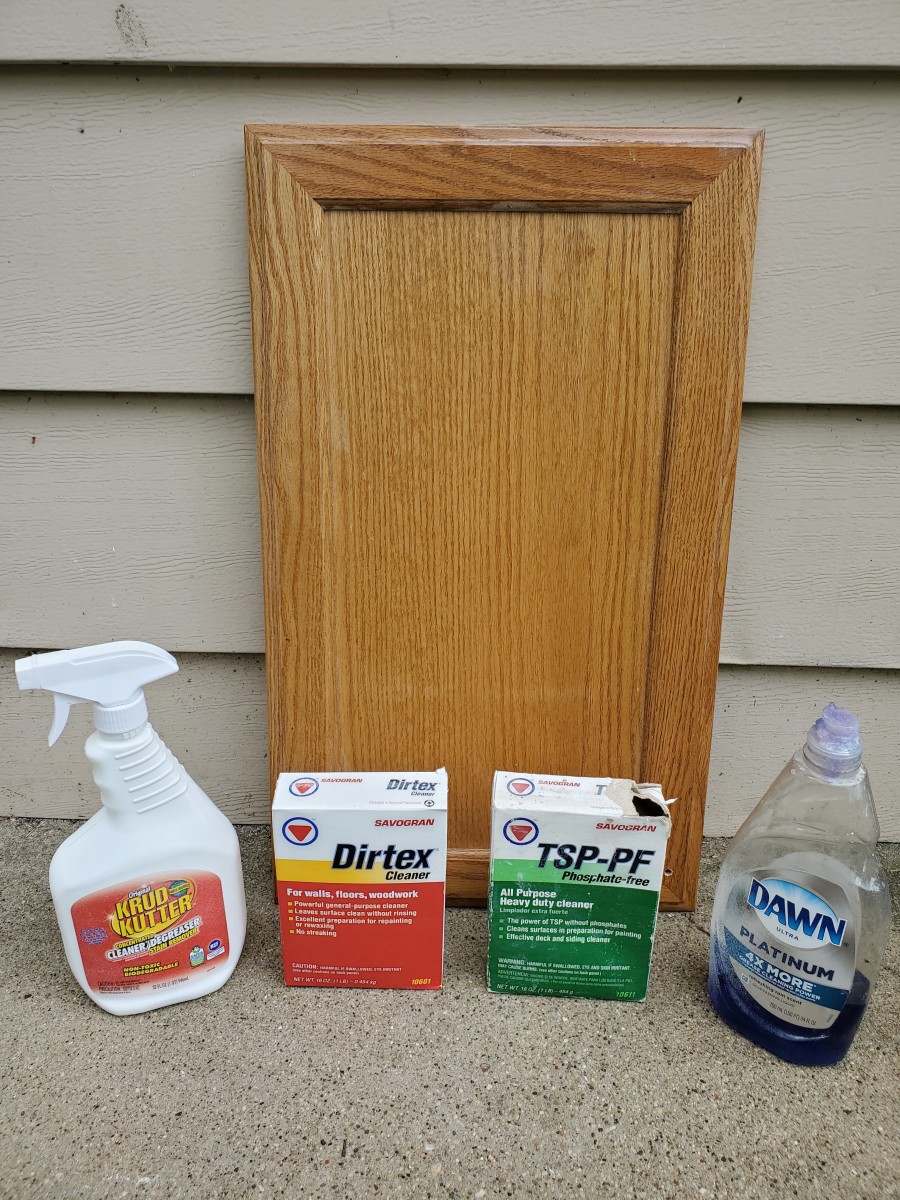
Gathering Supplies
Preparing your kitchen cabinets for painting begins with collecting the right supplies.
A thorough clean ensures the paint adheres properly and the finish is smooth.
Let’s dive into the essential cleaning solutions and tools you’ll need for this project.
Cleaning Solutions
The key to a great paint job is starting with a clean surface.
Choose the best kitchen cabinet degreaser before painting to remove grease and grime effectively.
- Cabinet degreaser for painting: Picks up oily residue and prepares surfaces.
- Mild detergent: Offers a gentle clean for less grimy areas.
- Vinegar solution: A natural option for cutting through buildup.
- Rubbing alcohol: Useful for spot-cleaning and difficult stains.
Tools And Equipment Needed
Gather these tools to make the cleaning process smooth and efficient.
| Tool | Use |
|---|---|
| Scrubby sponges | Apply degreaser and scrub surfaces. |
| Microfiber cloths | Wipe cabinets after cleaning. |
| Bucket | Mix cleaning solutions. |
| Gloves | Protect hands from chemicals. |
| Spray bottles | Apply solutions evenly. |
| Soft-bristle brush | Clean nooks and crannies. |
Preparing The Workspace
Before painting your kitchen cabinets, setting up your workspace is crucial. A well-prepared area ensures a smoother, cleaner painting job. Let’s dive into how to effectively prepare your workspace.
Covering Surrounding Areas
Protect your kitchen from paint splatters and spills. Here’s how:
- Use drop cloths: Lay them on the floor and over countertops.
- Plastic sheeting: Cover appliances and furniture to shield them from drips.
- Painter’s tape: Apply it around edges and on walls near the cabinets.
Setting Up Proper Ventilation
Good air flow is essential for safe painting. Follow these steps:
- Open windows: This helps to keep the air fresh.
- Use fans: Position them to blow outwards to push fumes away.
Remember to keep the area well-ventilated throughout the process.
| Material | Use |
|---|---|
| Drop cloths | Cover floors and countertops |
| Plastic sheeting | Protect appliances and furniture |
| Painter’s tape | Secure edges and walls |
| Fans | Enhance air circulation |
Clean your cabinets before you start painting. Use a cabinet degreaser for painting. This ensures the paint adheres well and lasts longer. The best kitchen cabinet degreaser before painting will remove all grease and dirt effectively.
Credit: www.fivestarpainting.com
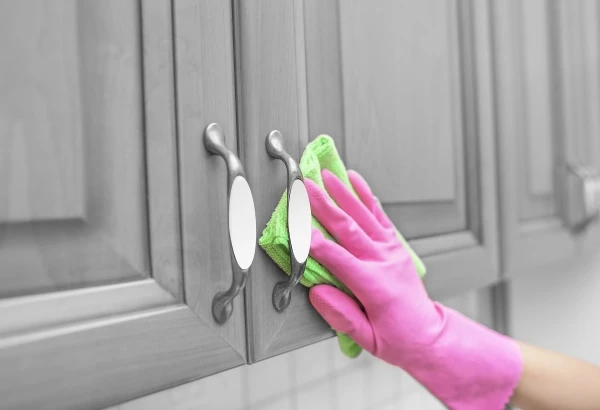
Cleaning The Cabinets
Before the transformation begins, cleaning the cabinets is crucial. A clean surface ensures the paint adheres properly. This step is not just about wiping away the dust. It’s about preparing your cabinets for a flawless finish. Let’s dive into the nitty-gritty of removing that stubborn grease and grime.
Removing Grease and Grime
Removing Grease And Grime
Kitchen cabinets collect more grease and grime than one might expect. To start, use a cabinet degreaser for painting. This product cuts through the oily residue. Apply the degreaser with a soft cloth. Give it some time to work its magic. Then, wipe the cabinets clean. Remember, a thorough degrease is vital for the best paint job.
Thoroughly Washing Surfaces
After degreasing, a good wash is next. Mix warm water with a mild detergent. Use a sponge for this task. Make sure to reach every nook and cranny. Rinse the surfaces with clean water. Dry them immediately with a soft towel. The goal is a spotless surface, ready for painting.
Choose the best kitchen cabinet degreaser before painting. It makes a world of difference. The cleaner the cabinets, the smoother the painting process. Get ready for cabinets that look as good as new!
Sanding The Surfaces
Before painting your kitchen cabinets, preparing the surfaces is crucial. Sanding creates a smooth base for paint to adhere to. It removes imperfections and ensures a flawless finish. With the right tools and techniques, you can sand your cabinets like a pro. Let’s dive into the process of choosing the right sandpaper and mastering sanding techniques.
Choosing The Right Grit Sandpaper
Finding the right sandpaper grit is essential for the perfect sanding job. Grit refers to the sandpaper’s abrasiveness. Lower numbers mean coarser grit; higher numbers indicate a finer grit. Start with a medium grit to remove old finishes and move to a fine grit for a smooth surface.
- Medium Grit (100-150): Strips old paint and varnish.
- Fine Grit (180-220): Smoothens the wood for priming.
Sanding Techniques
To ensure even sanding, follow these simple steps:
- Use a cabinet degreaser for painting to clean the surfaces.
- Choose the correct grit sandpaper for your cabinet condition.
- Work in the direction of the wood grain to avoid scratches.
- Apply even pressure throughout to avoid gouging the wood.
- Wipe the surface with a tack cloth to remove dust.
Remember, the best kitchen cabinet degreaser before painting ensures no residue is left that can interfere with sanding. After degreasing and sanding, your cabinets will be ready for a stunning coat of paint.
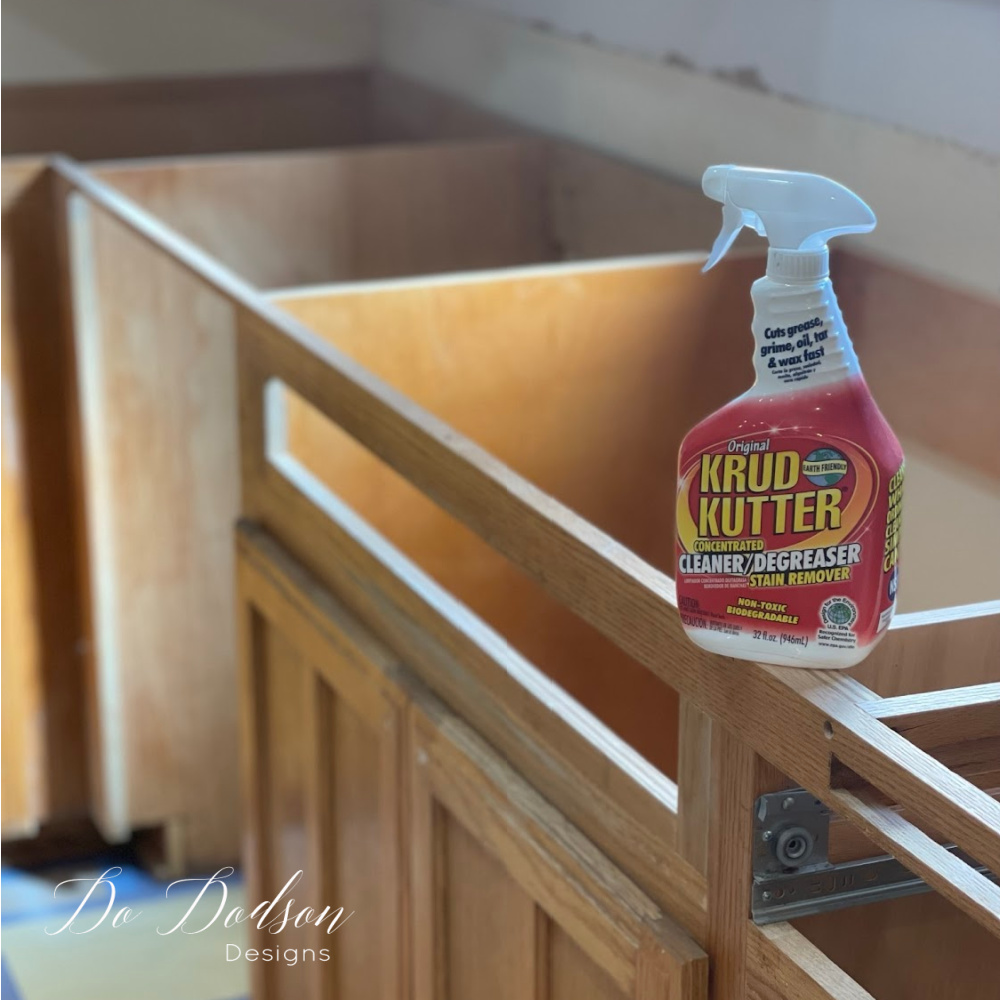
Credit: www.dododsondesigns.com
Priming The Cabinets
Before splashing on a new color, priming your kitchen cabinets is crucial. This step ensures a flawless finish. Let’s dive into how to prime cabinets effectively.
Importance Of Primer
Primer serves as the foundation for your paint job. It helps the paint adhere better and last longer. Without primer, paint could peel, chip, or fade quickly. A good primer also blocks stains and wood tannins from seeping through. Always choose a quality cabinet degreaser for painting. It preps the surface and helps the primer bond seamlessly.
Applying Primer Correctly
Even application is key when priming cabinets. Start by cleaning the cabinets thoroughly with the best kitchen cabinet degreaser before painting. This step removes grime and grease, ensuring a smooth base. Use a high-quality brush or roller designed for primer. Apply in thin, even coats. Allow sufficient drying time between coats as recommended by the primer manufacturer. Avoid rushing this step; patience pays off with a professional-looking finish.
Here’s a quick checklist to ensure correct primer application:
- Clean all cabinet surfaces with a degreaser.
- Fill in any holes or cracks with wood filler.
- Sand surfaces lightly after the filler dries.
- Remove all dust with a tack cloth or damp rag.
- Apply primer with long, even strokes.
- Wait for the first coat to dry before applying the second.
Painting The Cabinets
Ready to give your kitchen a fresh, new look? Painting the cabinets is a game-changer. But first, ensure they’re spotless. Use the best kitchen cabinet degreaser before painting for a clean surface. Now, let’s talk about paint!
Selecting Paint Type
Choosing the right paint is crucial for kitchen cabinets. Consider factors like durability, finish, and drying time. Oil-based paints are tough and long-lasting. Water-based paints, known as latex paints, dry faster and have less fumes. Both options work well, but many prefer water-based for its ease of use and clean-up.
Look for paints designed for cabinets. They’ll withstand daily wear and tear. A glossy finish is easy to clean, while a matte finish can hide imperfections. Remember, a good cabinet degreaser for painting preps the surface for the best results.
Applying Paint In Even Coats
For a professional finish, apply paint in thin, even coats. This prevents drips and ensures the paint dries evenly. Use a high-quality brush or roller designed for the type of paint you selected. Begin with the cabinet frames, followed by doors and drawers. Allow each coat to dry completely before adding the next.
- Start with a primer if you’re changing from a dark to a light color.
- Apply at least two coats of paint for full coverage.
- Sand lightly between coats for a smooth finish.
Patience is key. Rushing the process can lead to a less-than-desirable finish. Give your cabinets the attention they deserve for a stunning kitchen transformation.
Frequently Asked Questions
What Should I Clean Kitchen Cabinets With Before Painting?
Clean kitchen cabinets with a mixture of trisodium phosphate (TSP) and water to remove grease and ensure optimal paint adhesion. Rinse thoroughly and let dry before painting.
Can You Use Dawn Dish Soap To Clean Cabinets Before Painting?
Yes, you can use Dawn dish soap to clean cabinets before painting. Dilute it with water, gently scrub, and ensure you rinse and dry thoroughly.
What Is The Best Solution To Clean Kitchen Cabinets?
To effectively clean kitchen cabinets, mix a solution of mild dish soap and warm water. Apply with a soft cloth, scrub gently, then rinse with a damp cloth and dry thoroughly. This method removes grime and preserves the cabinet’s finish.
How To Prep Kitchen Cabinets To Paint?
Remove all hardware and clean surfaces thoroughly. Sand cabinets to create a smooth base. Wipe away dust, then apply primer. Once dry, sand lightly again before painting.
What Materials Are Needed To Clean Kitchen Cabinets?
To start, you’ll need mild soap, a soft cloth, and a gentle degreaser.
Conclusion
Preparing your kitchen cabinets for painting requires attention to detail and patience. By following the steps outlined, you’ll ensure a smooth, lasting finish. Remember to clean thoroughly, sand properly, and prime your surfaces. With these tips, you’re now ready to transform your kitchen’s look with a fresh coat of paint.
Happy painting!


One Comment