
How to Turn a Dresser into Kitchen Storage?
How to turn a dresser into kitchen storage, remove the drawers, sand, paint, and add shelving where needed. Consider attaching hooks or towel bars for added functionality.
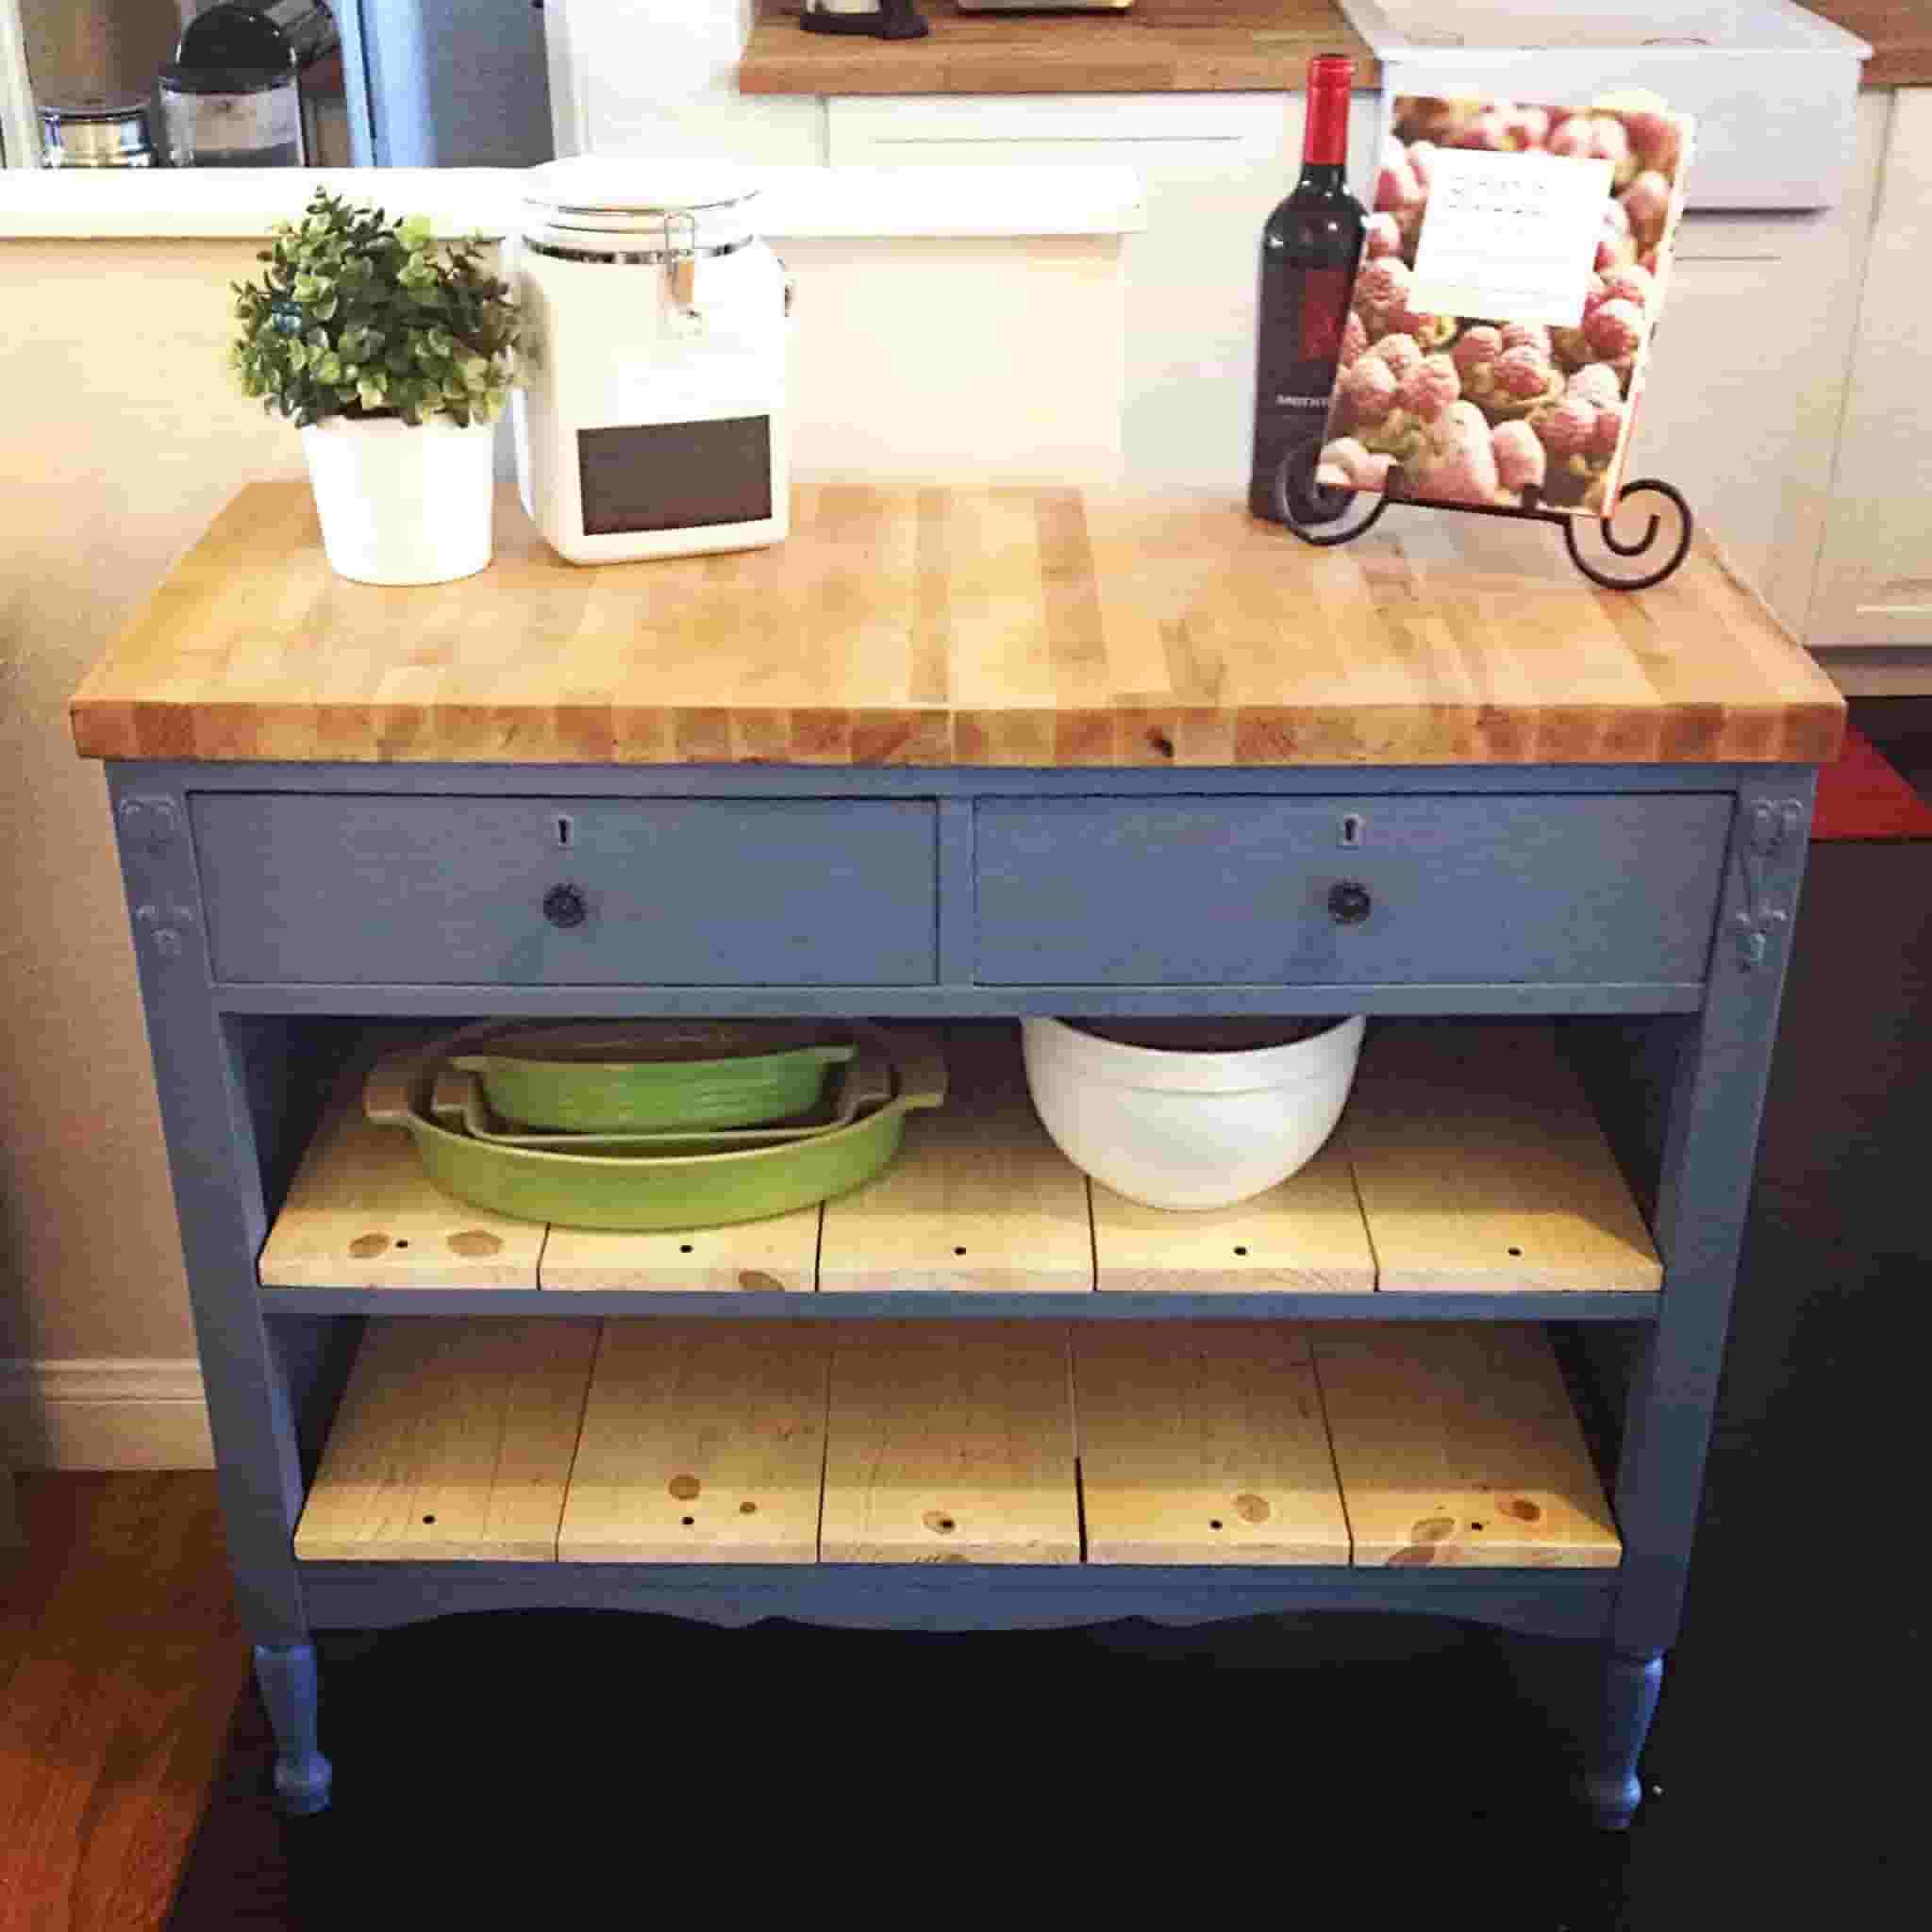
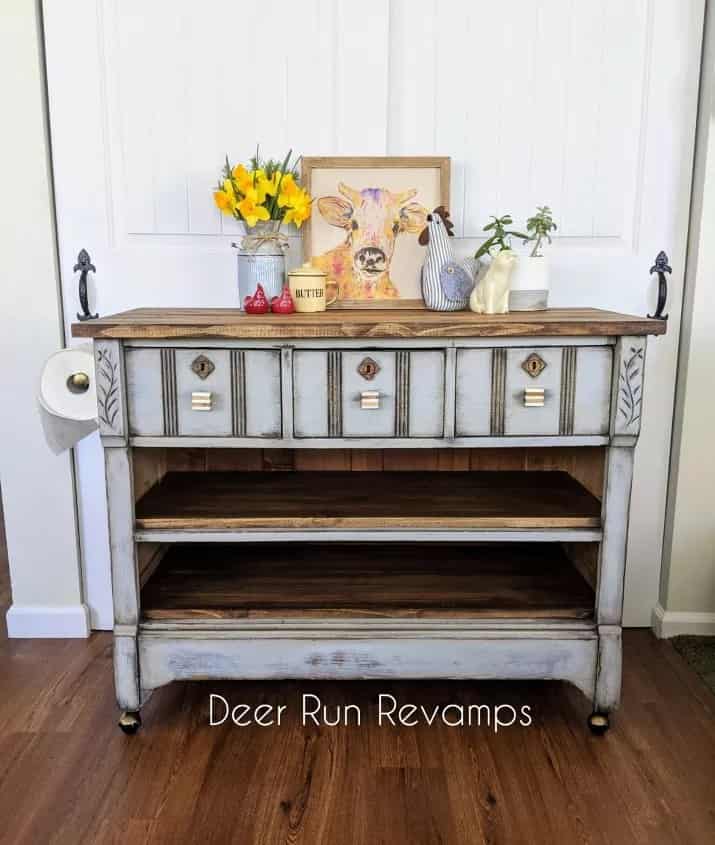
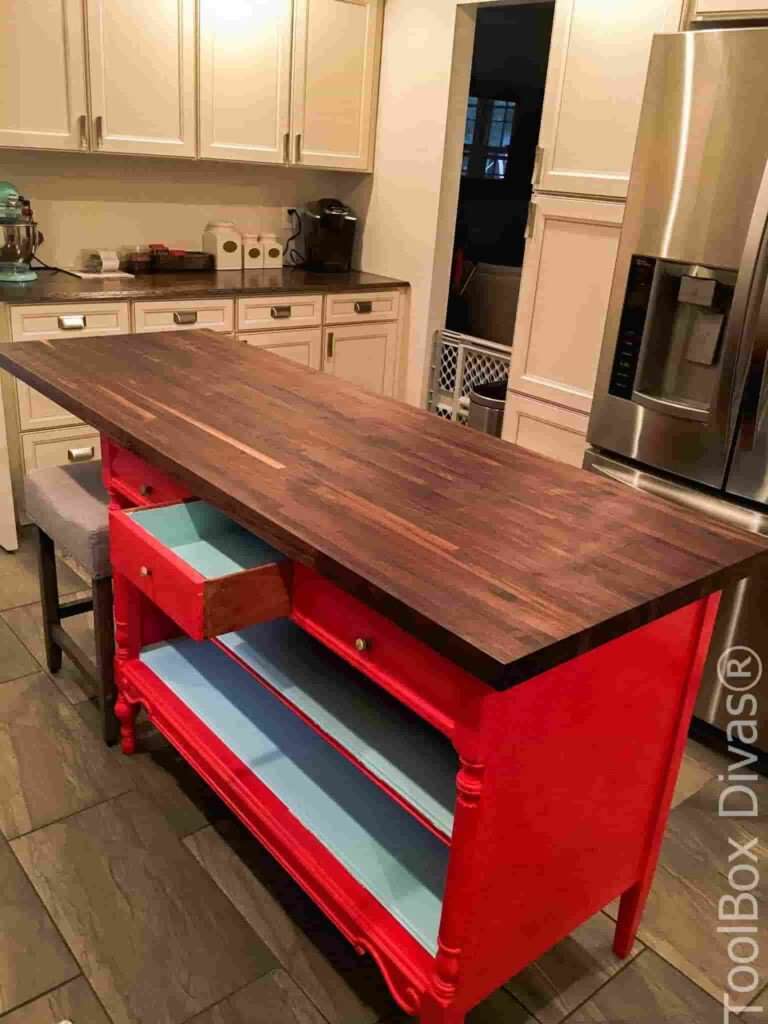
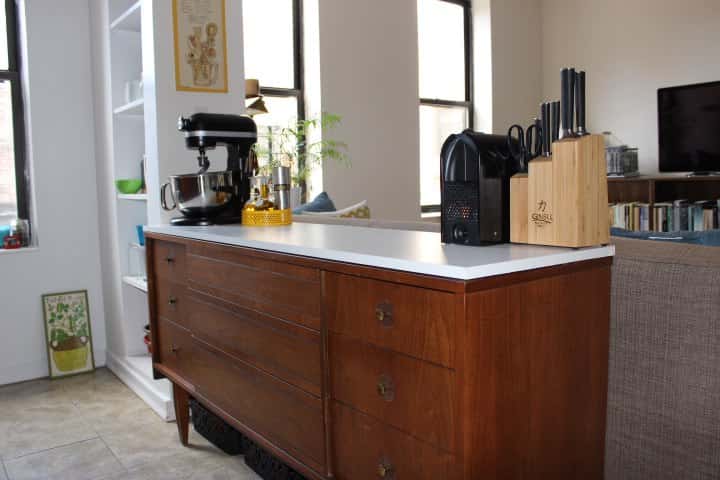
Repurposing a dresser into kitchen storage is a savvy way to introduce extra organization and a personal touch to your kitchen space. With the trend towards more unique, customized kitchens, using an old dresser can add character and provide bespoke storage solutions.
This project involves creativity and some DIY skills, focusing on making the piece functional for kitchen essentials like utensils, dishes, or pantry goods. It’s a practical endeavor that not only recycles a piece of furniture but also enhances the efficiency of your cooking area, making it a perfect weekend project for homemakers and interior design enthusiasts alike. The process may involve painting to fit your kitchen color scheme, adding new hardware to refresh the look, and customizing the interior shelving to suit your storage needs.
Before You Begin: Assessing The Dresser
Got an old dresser lying around? It might just be your new kitchen storage solution! Before transforming a dresser into kitchen storage, a good check is crucial. Let’s dive into the assessment phase.
Evaluating The Condition
Starting with condition evaluation sets the foundation for this project. Here’s what to look for:
- Check for stable drawers.
- Look for signs of wood damage.
- Inspect for pests or mold.
- Ensure the structure is sound.
Measuring Available Space
Space measurement tells you where the dresser will fit. Remember to:
- Measure floor area in your kitchen.
- Check for height clearance.
- Consider the space for drawers to open.
Envisioning The End Result
With a plan to envision the end result, the transformation begins. Aim for:
- A clear idea of storage needs.
- Creative designs to fit your style.
- Thoughts on additional features like a butcher block top.
Choosing The Right Tools And Materials
Transforming a dresser into a functional kitchen storage unit requires the correct tools and materials. This process not only breathes new life into a piece of furniture. It also adds charm to your kitchen space. Selection of appropriate supplies ensures a smooth makeover from dresser to kitchen storage miracle.
Basic Toolbox Essentials
Begin with the basics. Certainly! Below are the essential items you’ll need for your project:
- Screwdrivers: Different sizes for various hardware.
- Hammer: For any nails or to help remove drawers.
- Pliers: Essential when dealing with wires or stubborn nails.
- Measuring Tape: Precision is key in making sure everything fits correctly.
- Level: To ensure shelves are perfectly horizontal.
- Sandpaper or Sander: For surface prep before painting.
- Safety Gear: Glasses and gloves to protect your eyes and hands.
Selecting Paint And Finishes
Choose paints and finishes that match your kitchen’s style. Consider the following:
- Paint Type: Opt for semi-gloss or gloss for easy cleaning.
- Primer: An essential base coat for better paint adherence.
- Top Coat: A sealant to protect your paint job from wear and tear.
Always select non-toxic options to keep your kitchen safe for food storage.
Adding Hardware For Functionality
Hardware adds both aesthetic and practical elements. Use knobs, pulls, and handles to maximize usability. Drawer slides or casters could make access easier. Choose hardware that supports the weight of kitchen items and enhances the dresser’s charm.
- Drawer Pulls: Pick a style that complements your kitchen.
- Hinges: Ensure they’re sturdy for heavy cupboard doors.
- Casters or Feet: For mobility or to anchor the dresser.
- Drawer Liners: To protect the interior from spills and stains.
By carefully selecting your tools, paints, and hardware, you ensure a successful conversion of a dresser into a kitchen storage staple that’s not only functional but also full of character.
Preparation: Stripping And Sanding
Transforming a dresser into kitchen storage is an exciting project. To start off, it involves preparation: stripping and sanding. This step is crucial for creating a perfect base for your new kitchen masterpiece. With the right techniques, you can give an old dresser a new lease of life. Let’s get into how to prepare your dresser properly.
Safety First: Proper Gear
Before you start stripping and sanding, safety comes first. For your safety, ensure you have the appropriate gear on.
- Goggles – shield your eyes from dust
- Gloves – protect your hands from chemicals
- Respirator mask – keep fumes and particles away
- Long sleeves – cover your skin
Removing Old Paint And Varnish
Begin by tackling old paint and varnish. This is key for a fresh start. For this:
- Apply a chemical stripper with a paintbrush
- Let it sit as directed on the product label
- Use a scraper to gently remove the softened finish
- Clean off any residue with a cloth
Sanding Techniques For A Smooth Base
Sanding should be thorough for a smooth base. For best results:
- Start with a coarse sandpaper to remove rough spots
- Switch to a finer grit for a polished look
- Remember to sand in the direction of the wood grain at all times
- To eliminate all dust, use a moistened cloth for wiping down the surface
Customizing The Design
Customizing the Design of your dresser-to-kitchen storage transformation is where you can let your creativity shine. This isn’t just about creating space, it’s about making that space feel like a natural part of your kitchen. With a few key adjustments, your old dresser will not only fit in but stand out in the best way possible.
Adding Shelves And Dividers
Adjusting the internal layout increases functionality. Consider these steps:
- Measure the inside of the dresser.
- Plan where shelves and dividers will go.
- Cut pieces to size.
- Secure them in place.
This approach ensures every item has a home, from bulky pots to tiny measuring spoons.
Incorporating Spice Racks And Towel Bars
Spice racks and towel bars are practical additions.
- Attach spice racks to the inside of doors for easy access.
- Fix towel bars on the side to hang dishcloths.
These tweaks keep essential items within arm’s reach while preserving space.
Creative Touches With Decals And Stencils
Here’s how to give your dresser a unique flair:
- Select decals or stencils that match your kitchen’s theme.
- Position them on the dresser to plan out your design.
- Apply them carefully, smoothing out any bubbles or wrinkles.
These decorative details infuse personality into your new storage solution.
Finishing Touches: Painting And Sealing
Transforming a dresser into kitchen storage isn’t complete without the final artistic strokes. It’s time to dive into the world of colors and protective finishes. Give that dresser a new, vibrant look that stands up to kitchen chaos. Let’s talk paint and sealing:
Choosing The Right Paint For Kitchens
Kitchens demand durable, easy-to-clean surfaces. Begin with selecting a paint that withstands the hustle of everyday kitchen activities:
- Semi-gloss or gloss finish: Ideal for easy cleaning.
- Oil-based paint: Offers resilience against moisture.
- Latex formulas: Known for quicker drying times.
Applying The Finish Evenly
For a professional-looking finish:
- Prep the surface: Sand down for a smooth canvas.
- Use a primer: Ensures paint adheres and lasts longer.
- Even coats: Apply thin layers with a roller or brush.
- Dry thoroughly: Wait between coats.
Sealing For Durability And Easy Cleaning
Sealing is non-negotiable for kitchen storage:
- Clear polyurethane: A top choice for protection.
- Food-safe sealants: Consider for surfaces near food prep.
- Apply with care: Use thin, even layers for the best shield.
With these tips, that dresser will not only shine in new paint but also enjoy a longer life, tackling spills and splatters with ease.
Organizing The Kitchen Dresser
Transforming a dresser into kitchen storage adds charm to your cooking space. Yet, organization is key. Let’s ensure every fork and spoon finds its place.
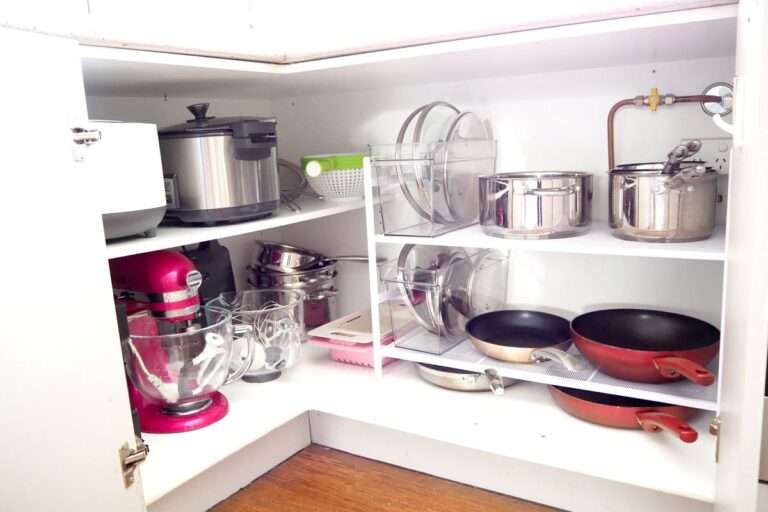
Maximizing Vertical Space
Stack shelves within drawers. Use tiered inserts for spices. Hang mugs on hooks under shelves.
- Adjust shelf heights to fit appliances.
- Store cutting boards vertically with homemade or store-bought dividers.
Utilizing Drawer Dividers
Drawer dividers create specific spots for items.
| Utensils: | Assign a section for each type. |
| Tools: | Group similar items together. |
| Linen: | Roll towels for easy grabbing. |
Choose adjustable dividers for best fit.
Labeling For Efficiency
Labels save time. Stick them on the inside of door fronts, jars, or containers.
- Write clearly or print labels.
- Use color-coding for categories.
Labelled sections maintain order. Family members can help keep things tidy.
Maintaining Your New Kitchen Storage
Turning a dresser into kitchen storage adds charm and functionality to your space. Once in place, it’s essential to keep it looking great and working well. With proper care, your revamped dresser can serve your kitchen needs for years.
Regular Cleaning Tips
Keep your dresser-turned-storage sparkling. Here are easy cleaning tips:
- Wipe down shelves weekly.
- Use mild soap and water for spills.
- Dry surfaces immediately to avoid damage.
- Organize contents regularly to reduce clutter.
Touching Up Paint And Finish
A fresh look keeps your dresser looking new. Follow these simple steps:
- Check for chips or scratches monthly.
- Touch up paint or finish as needed.
- Use products matching the original finish.
- Apply a protective coat yearly to shield surfaces.
Adapting Space For Changing Needs
Change happens. Make your storage adapt with it:
- Add or remove shelf dividers as per need.
- Install hooks inside doors for more hanging space.
- Adjust shelf heights for new kitchen gadgets.
- Use baskets to group similar items together.
Frequently Asked Questions Of How To Turn A Dresser Into Kitchen Storage?
What Materials Are Needed For Dresser Transformation?
You’ll need sandpaper, paint or stain, new hardware, and shelving inserts. Personalize with hooks, labels, or decorative elements to match your kitchen’s aesthetic. Always start with a clean surface for best results.
How To Prep A Dresser For Kitchen Use?
Start by cleaning the dresser thoroughly. Then remove old paint or finish with sandpaper. Apply a coat of primer, then paint or stain as desired. Allow it to dry completely before proceeding with further modifications.
Can I Add Shelves To A Dresser?
Absolutely! Measure the interior space to add custom shelving. Use plywood or medium-density fiberboard (MDF) cut to size. Secure the shelves with brackets or wood glue for sturdiness, turning the dresser into practical kitchen storage.
Is It Necessary To Replace Dresser Hardware?
For kitchen storage, consider replacing the hardware for functionality and aesthetics. Choose handles and knobs that can withstand frequent use and match your kitchen’s style. This upgrade can also modernize an old dresser instantly.
Conclusion
Transforming a dresser into kitchen storage not only maximizes space but also adds a unique charm. By following the steps outlined, you give old furniture new life and your kitchen a touch of creativity. So, grab your tools and let your culinary haven benefit from this clever, stylish solution.