

Best Way To Hang Ikea Cabinet
Best way to hang IKEA cabinets is, start by attaching the suspension rail securely to the wall. Ensure the rail is level before mounting the cabinets onto it.
Hanging IKEA cabinets can transform your space into an organized haven with a sleek, modern look. Installing these cabinets requires precise attention to detail, as even a small error can affect the final result. To ensure a successful installation, having a clear guide and the right tools at hand is crucial.
Wall preparation, careful measurements, and systematic following of IKEA’s instructions will lead to a set of securely mounted cabinets. This part of your home improvement journey not only improves functionality but also adds to the aesthetic appeal of your living space. Success lies in the meticulous execution of each step, starting with the proper installation of the suspension rail.
Introduction To Ikea Cabinet Installation
Welcome to your step-by-step guide on Ikea Cabinet Installation. From first-time DIYers to seasoned handymen, installing Ikea cabinets can be a satisfying endeavor that brings both beauty and functionality to any home. With this guide, anyone can transform their space with the signature look and utility that Ikea cabinets offer.
Popularity Of Ikea Cabinets
Ikea cabinets are renowned worldwide for their stylish designs, affordability, and adaptability. These qualities have made them a leading choice for homeowners and apartment dwellers alike. Not only do they add a sleek and modern touch, but they also provide smart storage solutions for any kitchen, bathroom, or storage area. Their modularity allows for easy customization to fit any space perfectly, making them an incredibly popular option for those looking to renovate their interiors.
Preparation Steps Before Installation
Before diving into your Ikea cabinet installation, preparation is key. Ensure a smooth and efficient process by following these vital steps:
- Measure your space: Accurate dimensions are crucial for selecting the right cabinet sizes.
- Gather necessary tools: A hammer, level, drill, tape measure, and pencil should be on hand.
- Clear the area: Remove any existing cabinetry or obstacles from the installation space.
- Review the manual: Ikea’s instruction booklet is clear and detailed; reading it thoroughly will help prevent any mistakes.
- Organize parts: Lay out all components and hardware so they’re easily accessible during installation.
With these steps attended to, you’re now ready to start mounting your new Ikea cabinets!
Tools And Materials Required
Preparing the right tools and materials is the first, crucial step in hanging Ikea cabinets. A smooth installation relies on having everything you need at hand. Don’t let a missing tool delay your project! Here’s what to gather before starting.
List Of Necessary Tools
- Drill: For making precise holes.
- Level: To ensure your cabinets hang straight.
- Stud Finder: Essential for locating studs in the wall.
- Measuring Tape: For accurate measurement.
- Screwdriver: For securing hardware and adjustments.
- Pencil: To mark drill spots and alignments.
- Hammer: Sometimes needed for minor adjustments.
- Safety Gear: Glasses and gloves for protection.
Choosing The Right Hardware
Selecting suitable hardware is key to a sturdy installation. Ensure the hardware matches the cabinet’s requirements and wall type. Use robust anchors if studs are not available. Quality screws fit for the cabinet weight add extra security.
| Item | Type | Size | Quantity |
|---|---|---|---|
| Mounting Rail | Steel | According to wall length | 1 |
| Wall Anchors | For drywall/plaster | Appropriate for screw size | As needed |
| Screws | Wood/Metal | Depends on wall material | As needed |
| Washers | Metal | Matches screws | As needed |
Remember to verify the weight limit of your chosen hardware with the cabinet specifications to avoid mishaps. Gather all the parts before starting, to ensure a steady workflow. Careful preparation guarantees a secure and pleasing result.
Measuring And Marking
Welcome to the crucial step in ensuring your new IKEA cabinets enhance your space: measuring and marking. Proper placement and alignment are pivotal for a polished look. Committing to accurate measurements secures a seamless installation. Let’s walk through how to get this right.
Determining Cabinet Placement
Begin by deciding where your cabinets will sit. Consider the room’s layout and how the cabinets will serve your needs. Use tape to outline the cabinet dimensions on the wall. This visual guide aids in precise placement.
- Start by pinpointing the highest point of the floor using a level.
- Mark the wall to indicate the bottom edge of the upper cabinets.
- Measure from this mark to dictate cabinet height, considering countertop clearance.
- Use a pencil to make light, erasable lines to guide you during installation.
Leveling And Wall Marking Techniques
Wall marking is integral for a uniform setup. Leveling ensures your cabinets don’t tilt or seem off-kilter.
| Technique | Tool | Description |
|---|---|---|
| Horizontal Leveling | Level | Place the level beneath the cabinet outline to ensure a straight horizontal line. |
| Vertical Alignment | Plumb Line | Dangle a plumb line from the upper mark to confirm cabinet sides hang straight. |
- Position your level against the wall where the bottom of the cabinet will align.
- Draw a straight, level line to mark this point. This is your reference for the bottom of the cabinets.
- Repeat the process for the upper edge of the upper cabinets.
- For tall or floor cabinets, use a plumb line to mark a true vertical.
- Confirm all markings with a level before proceeding to mount.
Assembling The Ikea Cabinets
Assembling the Ikea Cabinets marks the beginning of transforming a room. It’s an exciting yet crucial step requiring attention to detail. Efficient assembly forms the backbone of a sturdy, reliable Ikea cabinet setup, laying the groundwork for successful installation. Grasping the instructions and proper technique ensures a smooth build. Let’s dive into the steps and tips to master this process.
Step-by-step Cabinet Assembly
- Unpack the Box: Lay out all parts on a soft surface to prevent scratches.
- Check for All Pieces: Refer to the manual to ensure every component is present.
- Start with the Frame: Connect the sides, top, and bottom as indicated in the guide.
- Insert Back Panel: Slide it into the groove before securing the frame completely.
- Attach Hardware: Fix hinges, drawer slides, and other hardware following the illustrations.
- Assemble Doors and Drawers: Build them separately, then attach to the frame.
- Final Touches: Install shelves and cover panels as the finishing step.
Tips For Smooth Assembly
- Read Instructions: Familiarize yourself with the manual before starting.
- Organize Parts: Keep small pieces in separate containers for easy access.
- Use Correct Tools: Have a hammer, screwdriver, and level handy for precision.
- Don’t Rush: Take your time to avoid mistakes and potential damage.
- Seek Help: Get an extra pair of hands for lifting and holding parts in place.
- Double-Check Work: Regularly ensure everything aligns and fits snugly.
- Be Gentle: Apply force carefully to prevent breaking fragile components.
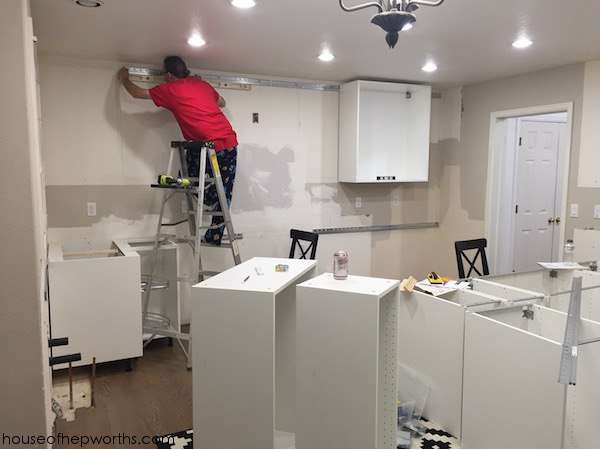
Mounting The Rail System
Ready to give your space a fresh look with Ikea cabinets? Mounting the rail system is a crucial step. It’s the backbone for stable, level cabinetry. Proper installation ensures a seamless finish. Let’s dive into how to mount the Ikea cabinet rail system with precision.
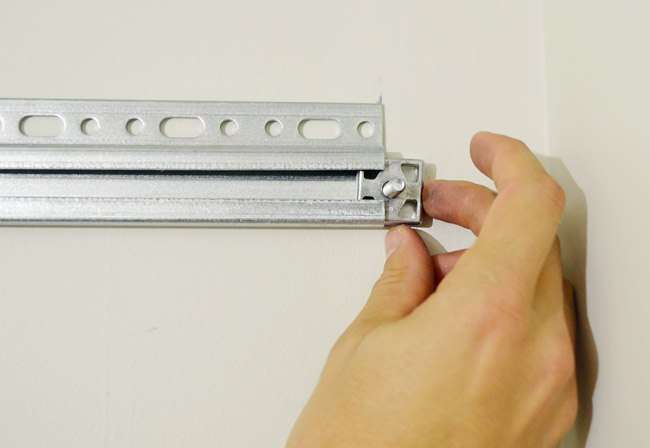
The Importance Of Securing The Rail
The rail holds your cabinets in place. It’s the secret to long-lasting cabinetry. A well-secured rail means no sagging over time. It distributes weight evenly, ensuring stability. Make sure your rail is level before moving on. This is key for a professional look.
Drilling And Attaching The Rail
Now, it’s time to attach the rail to the wall. To complete the task, make sure you have a drill, screws, and a level on hand. Here’s a step-by-step guide:
- Locate the supporting beams within your wall by utilizing a stud finder tool.
- Mark the stud locations with a pencil.
- Hold the rail against the wall.
- Use the level to ensure the rail is straight.
- Mark the drill points on the rail and wall.
- Pre-drill holes into the studs.
- Align the rail over the holes.
- Screw the rail firmly into place.
Double-check the rail is level after securing. This will save time later. Strong attachments mean confidently hanging your Ikea cabinets.
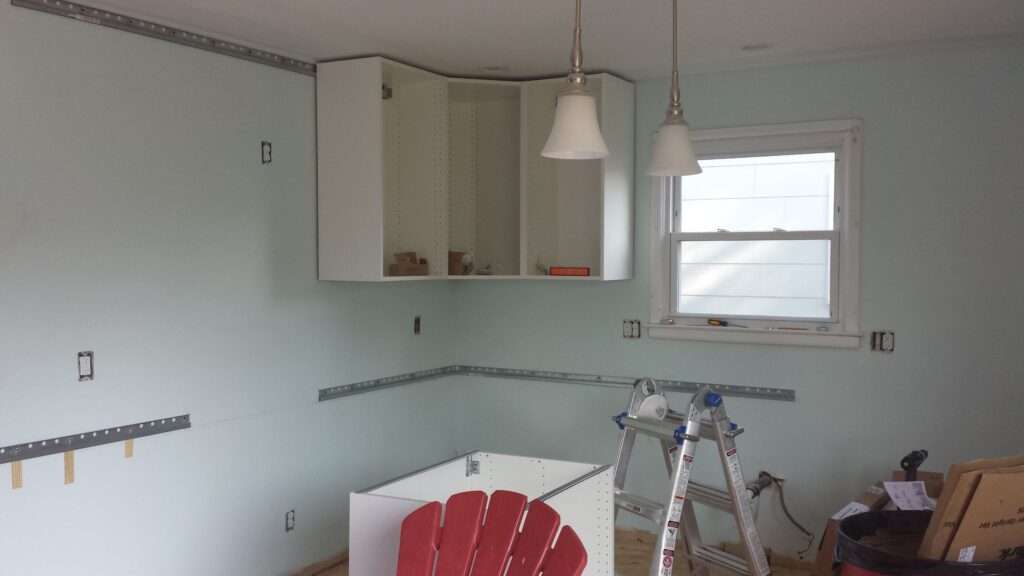
Hanging And Securing The Cabinets
Hanging Ikea cabinets is a task that brings both style and function to your space. The cabinets must hang securely to ensure they are safe and look great. Mounting them correctly is crucial. Let’s take a closer look at the process to guarantee your cabinets are set up for success.
Attaching Cabinets To The Rail
Ikea’s system makes attaching cabinets to the rail straightforward. Start by installing the suspension rail directly into wall studs. Use a level to ensure it’s perfectly horizontal. Once in place, hook the cabinet onto the rail and adjust until it’s in the right position.
- Locate wall studs with a stud finder.
- Secure the rail with screws into each stud.
- Hang cabinets and adjust side-by-side for alignment.
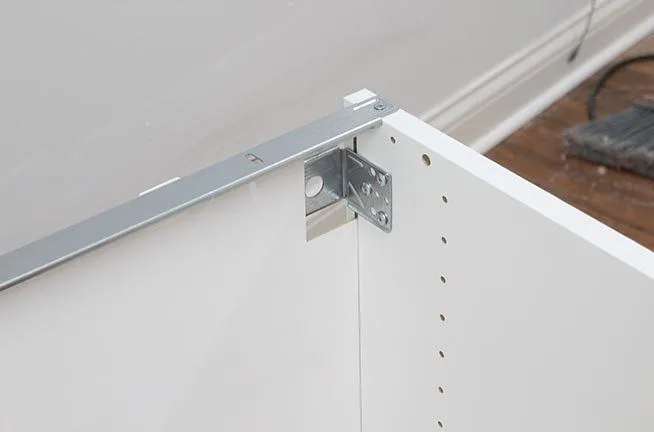
Ensuring Safety And Stability
A stable cabinet installation protects your items and prevents accidents. After hanging, use the provided brackets to fasten each cabinet to the wall at the top and bottom. This step is vital, especially in homes with children or pets.
| Step | Tool | Action |
|---|---|---|
| 1 | Screwdriver | Tighten screws where brackets meet the wall. |
| 2 | Level | Double-check that cabinets are level after securing. |
Connect adjacent cabinet units together using bolts and the predrilled holes. This creates a single, cohesive unit, adding to the installation’s stability.
- Bolt units together at the top, middle, and bottom.
- Ensure all cabinets are flush and level after joining.
Finishing Touches
‘Finishing Touches’ are what transform your newly installed Ikea cabinets from mere fixtures to sleek and functional parts of your kitchen. After securing them to your wall and ensuring everything lines up, give your cabinets that polished look with these final steps:
Adjusting Doors And Drawers
Evenly aligned doors and drawers are key to a professional finish:
- Check the alignment of each door and drawer.
- Use a screwdriver for hinges adjustments.
- Adjust the position of doors horizontally and vertically.
Cosmetic Enhancements
Beyond function, aesthetics play a big part in kitchen appeal:
- Install door handles or knobs for easy opening.
- Apply molding or trim for a custom look.
- Choose decorative panels to cover exposed cabinet sides.
Frequently Asked Questions For Best Way To Hang Ikea Cabinet?
How Do You Secure Ikea Cabinets To The Wall?
To secure IKEA cabinets to the wall, attach the supplied suspension rail directly to your wall studs. Secure the cabinets onto the railing system and firmly fasten them in position. Ensure they’re level, then use screws to fasten each cabinet’s upper back panel to the wall for added stability.
Can You Hang Ikea Cabinets?
Yes, you can hang IKEA cabinets. Follow the manual precisely, use the correct tools, and ensure your wall can support the cabinet’s weight. For safety, consider hiring a professional installer.
How To Install Ikea Cabinets Without Suspension Rail?
Begin by marking your wall studs for cabinet placement. Securely mount a sturdy, level ledger board aligned with the cabinet’s bottom edge. Hang the cabinets on the ledger, fastening them to the studs. Ensure each cabinet is level and secure it to adjacent units.
Finish by removing the ledger board.
Do I Need Suspension Rail For Ikea Base Cabinets?
Yes, IKEA recommends using a suspension rail for mounting base cabinets to ensure they are level and securely attached to the wall.
Conclusion
Hanging Ikea cabinets is truly a DIY triumph. With the right tools, patience, and this guide, you’ve mastered the task. Celebrate your success and enjoy the fresh look of your space. Remember, each step is crucial for sturdy, stylish storage.
Ready for your next home project?


One Comment